Category Tips and Tricks

Enabling Macros in Outlook

I love macros, they are the easiest way to automate your tasks, and if you’re on my site you know I love to automate repeated tasks. Problem is doing that in Outlook is doing it safely. I personally don’t enable macros unless I’ve personally looked at the code.

With that in mind, I have some macros that automate emails and signatures (some of my signatures use layered images and text, which the default Outlook signatures can’t handle). Before we do that I wanted to walk through how to set some security up for doing that.

We will disable Macros, and have Outlook notify us if we use a macro with a certificate (one you PC already knows about and trust, but publising the certificate ourselves). This way we know it isn’t some random Macro, it’s one we wrote.

Step One: Developers Tab

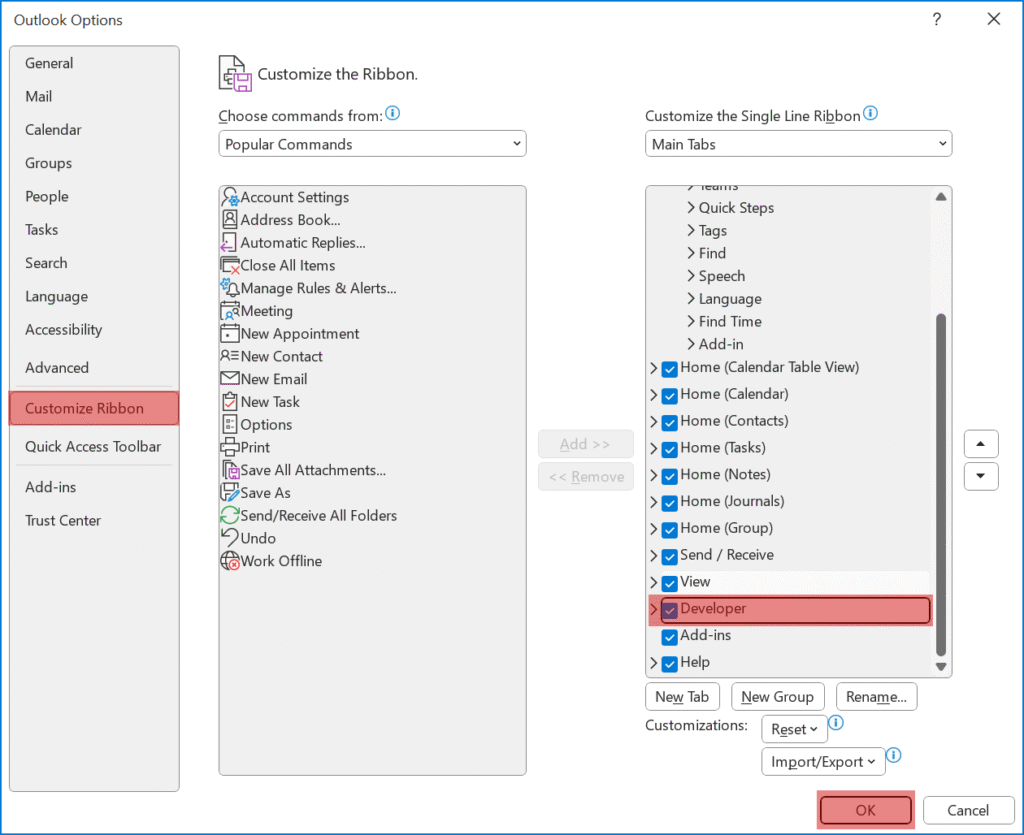
We are going to need the Developers tab for this. Hopefully you already know how to do this one, but just in case, from within Outlook:

  • File > Options > Customize Ribbons.
  • Tick Developer.
  • Click OK.
Developers Tab Selection
Developer Tab

Step Two: Set the Security

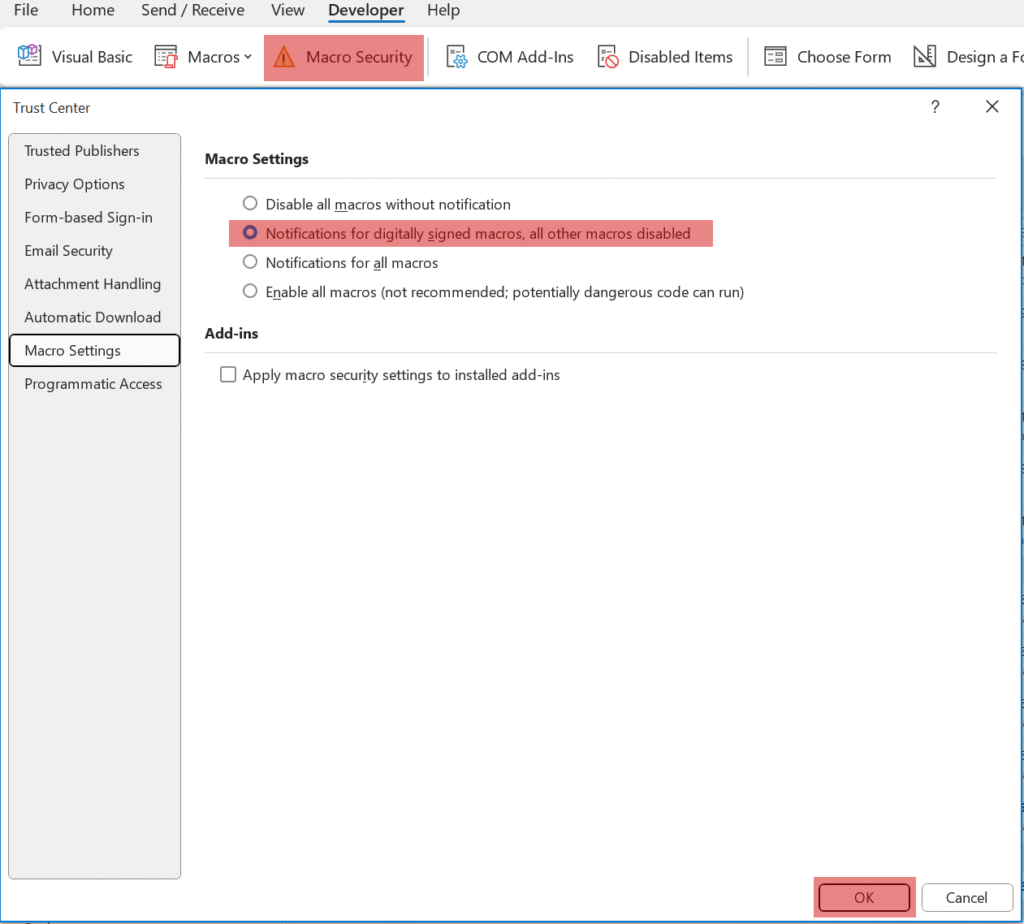
  • From the Developers Tab click the Macro Security button.
  • Set the Macro Settings to Notifications for digitally signed macros, all other macros disabled.
  • Click OK.
macro Security

Step Three: Add your Macro

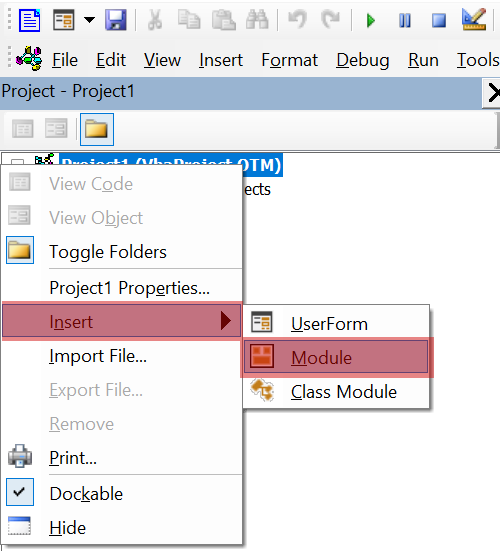
  • From the Developers Tab click the Visual Basic button , then  Insert > Class Module.
  • Insert you VBA Macro.
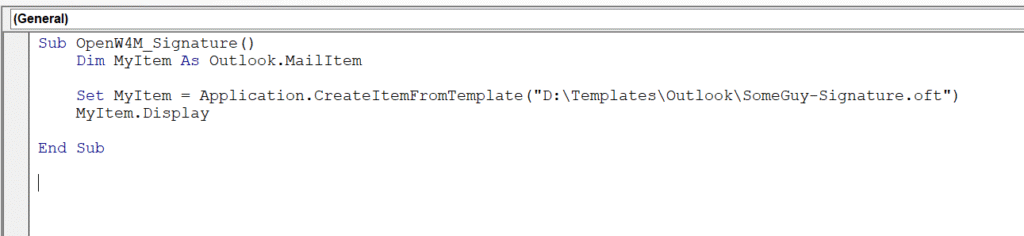
Sub OpenW4M_Signature()
    Dim MyItem As Outlook.MailItem
     
    Set MyItem = Application.CreateItemFromTemplate("D:\Templates\Outlook\SomeGuy-Signature.oft")
    MyItem.Display

End Sub
Example Code

This is a simple macro to open a oft or Message Template. To make a oft file, just create an email with everything you want it to have, then go File > Save As and change the type to Outlook Template (*.oft).

  • Click Save.
  • Close Outlook and Save the VbaProject.OTM is asked.
Clicking Visual Basic

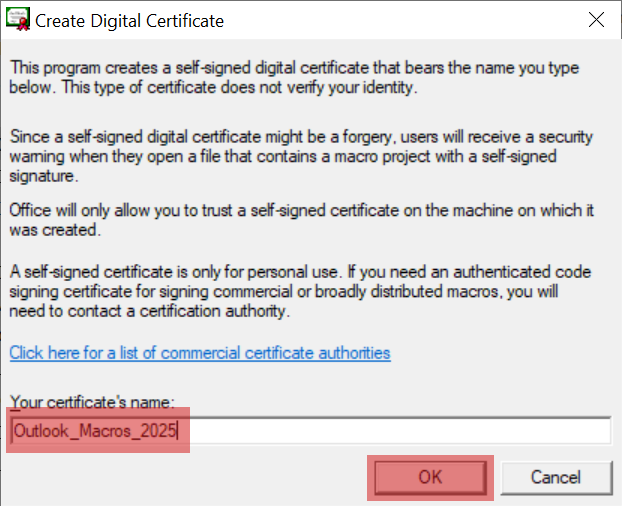
Step Four: Create a Certificate

  • Run the following:
    • C:\Program Files\Microsoft Office\root\Office16\Selfcert.exe
    • Note: This path will depend on the first version of Office you have installed, so you might have to search for Selfcert.exe in your C:\Program Files\Microsoft Office\ folder.
  • Enter a relevant Name and click OK.
  • Click OK on the Successful Creation Message.

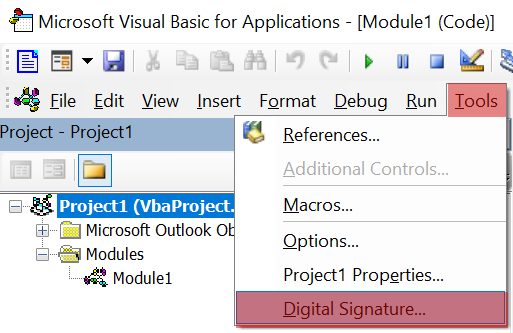
Step Five: Assign the Certificate

  • Open Outlook again.
  • From the Developers Tab click the Visual Basic button.
  • With your VbaProject.OTM selected, click Tools > Digital Signatures…
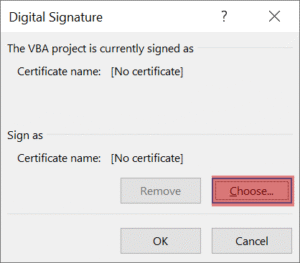
  • Click the Choose… button.
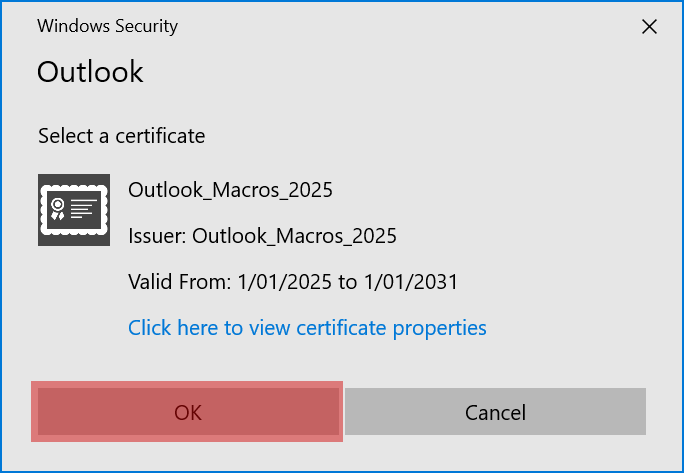
  • Click OK , if you certificate is shown (most likely, or use more choices to find it).
  • Click OK.
  • Close Outlook – and click yes to save VbaProject.OTM.

Step Six: The Loop

Getting that certificate to stick is the issue. I’ve had real trouble applying the certificate saving, closing Outlook and reopening it, only to five my Vbaproject.OTEM doesn’t have the certificate applied, and you may need to repeat Step 5 a few times – The last time I assigned a new certificate helping someone, it only took 1 repeat for it to take effect.

Once this is working, you will see this, the first time you run a macro each time you open Outlook. If you leave Outlook open for days/weeks – you will only see it that first time.

Step Seven: Adding it as a Button

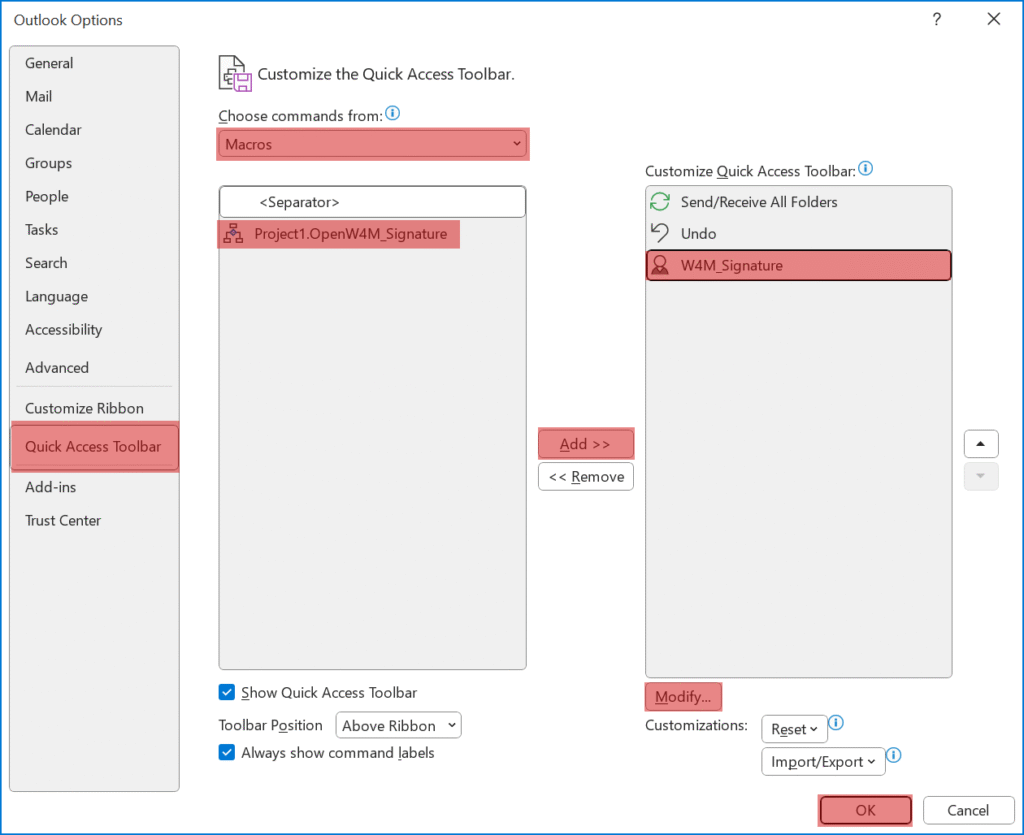
  • For this Macro you want it to be in the Outlook Quickbar, but some of the Macros I’ll share you would add to the Quickbar of a Message itself, just click on the drop down in your Outlook bar and click More Commands…
  • From the Choose commands from drop down, select Macros.
  • Select you Macro click the Add>> button, then with it selected on the right, click the Modify… button to choose a better icon.
  • Then Click OK.

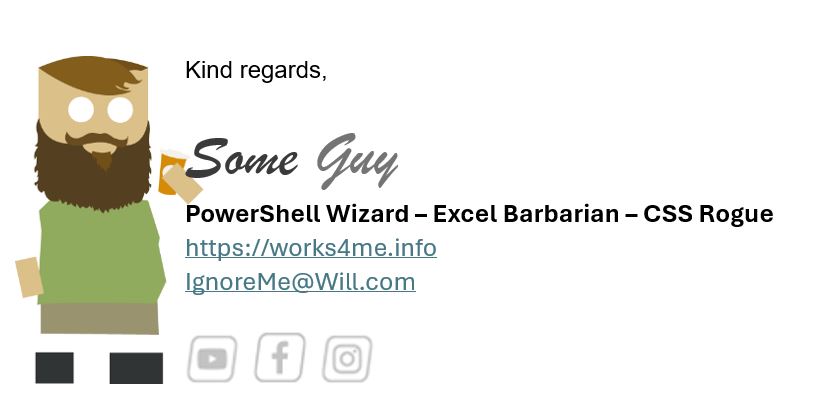
Now at the click of a button – I get my email opened with a super customised signature.

Over Document your Code

I get the desire to skip documenting, it’s not the fun part, and besides the code is self documented… right?

Look, I’m inherently lazy. Which means I don’t want to figure out how this works in a years time when I need to tweak it, or reinvent the wheel when I want to do something similar again. This is why I use OneNote to keep my own Knowledge Base for any task I do at work, and why I over document all my code.

Tip One: Seperate Sections

Use a Standard Sectioning to allow you to move around the code – and make those comments really distinct so it doesn’t get blurred into the code:

# Created by Works4me.info

#############--------------------------------------------------#
#############                                                  #  All the Global variables that you will
#############             +-+-+-+-+-+-+-+-+-+                  #  call in the rest of the code.
#############             |V|a|r|i|a|b|l|e|s|                  #
#############             +-+-+-+-+-+-+-+-+-+                  #  Sometime this might execute stuff, so
#############                                                  #  think of this as a setup section too.
#############--------------------------------------------------#  --------------------------------------

$global:Today = Get-Date
$global:AddDescription = $True

#VERSION OUTPUT DATA
$global:Version = "2.0"
$global:VersionDate = "1/2/2025"


#############--------------------------------------------------#
#############                                                  #  The Functions that are repeatedly used  
#############          +-+-+-+-+-+-+-+-+-+-+-+-+-+-+           #  by rest of the code, think of these
#############          |C|o|r|e| |F|u|n|c|t|i|o|n|s|           #  as Functions used by Functions.
#############          +-+-+-+-+-+-+-+-+-+-+-+-+-+-+           #  --------------------------------------
#############                                                  #  
#############--------------------------------------------------#  


#---------------------------------------------------------------------------------------------
#    Base Menu                     
#---------------------------------------------------------------------------------------------
function Make-Menu {
    
    # This is a really big function
    # and could distract from the point
    # if it's in here.


}


#############--------------------------------------------------#
#############                                                  #  The Various unique Functions 
#############            +-+-+-+-+-+-+-+-+-+-+-+-+             #  that do the fancy pants part
#############            |D|o| |F|u|n|c|t|i|o|n|s|             #  and navigation of your code.
#############            +-+-+-+-+-+-+-+-+-+-+-+-+             #  ----------------------------
#############                                                  #  
#############--------------------------------------------------#  


#---------------------------------------------------------------------------------------------
#    Welcome Menu calling
#---------------------------------------------------------------------------------------------
function Do-Welcome {
    
    cls
    Make-Menu -OptionQuit -MenuTitle "WELCOME Menu" `
    -Option1 "Display User" -Function1 "Do-Main01" `
    -Option2 "Display Day" -Function2 "Do-Main02" `
    -Option3 "Other Options" -Function3 "Do-SubMenu"
}


#############--------------------------------------------------#
#############                                                  #  Simply the section in which
#############             +-+-+-+-+-+-+-+-+-+-+-+              #  you call all the functions &
#############             |R|u|n| |S|e|c|t|i|o|n|              #  excute the core part of the
#############             +-+-+-+-+-+-+-+-+-+-+-+              #  code.
#############                                                  #  ----------------------------
#############--------------------------------------------------# 

#### Load the initial Menu
Do-Welcome

#---------------------------------------------------------------------------------------------

When you look at the above code you see the skeleton of every PowerShell Script I write. Big block section markers, and banners for every individual Function.

  • Variables
  • Core Functions
  • Do Functions
  • Run Section

Tip Two: Side Notes

 # Take action based on user input
     switch ($choice01) {
        1 {
            if($Option1 -ne ""){                    #--------------------------------------
               cls                                  # Note: Every choice will end the Menu
               $test = & $Function1.ToString()      # by setting $Choice01 to "Q".
               $choice01="Q"                        # This means wherever you go, you
            }                                       # need to Call this Function again.
        }                                           #--------------------------------------
        2 {
            if($Option2 -ne ""){
               cls       
               $test = & $Function2.ToString()
               $choice01="Q"
            }
        }

It might be annoying to add, but Notes like this stand out and are easy to read and spot when you are reviewing the code later.

Pro Tip: If you use Notepad++, you can hold ‘ALT’ and select any section to insert a column of comment characters.

Tip Three: Use Ascii Art to build those funky sections

I don’t have the time or inclination to manually create those Sections, so reuse what you can and build that template with an online Ascii Art generator like https://it-tools.tech/ascii-text-drawer

Tip Four: Explain Everything

#Check for Group Membership for each ($Group in $global:Groups.Groups) {
    # Group does not exist in AD
    if ($ADGroups.SamAccountName -notcontains $Group) {
        Write-Host "    $Group group does not exist in AD" -ForegroundColor Red
        Continue
    }
    
    # User is already a member of the group
    if ($ExistingGroups.SamAccountName -eq $Group) {
        Write-Host "    $UserSam already exists in group $Group" -ForeGroundColor Yellow
    } else { # Add user to to group    
        Add-ADGroupMember -Identity $Group -Members $UserSam
        Write-Host "    Added $UserSam to $Group" -ForeGroundColor Green
    }
}

The code might be self explanatory, but with the comments it allow you to decipher the intention without having to interpret all of the code. This will means you can find the section you want to review or understand quickly.

Notice how I’ve attempted to blend the comment into the code, you could for example read:

“User is already a member of the group if SamAccount name equals $Group”

“Else add the user to the group”

Why this Matters

Future you will thank present you for these extra 10 minutes of documentation. When you’re troubleshooting at 2 AM or your colleague needs to modify your script, those comments become the difference between ‘genius!‘ and ‘what was I thinking?