Posts tagged Code

Event Log Properties – PowerShell

One of the best uses of PowerShell in my experience is auditing the Event Logs, and then emailing a HTML report highlighting issues. The issue I have had with that, is once I know what Event ID I want from what Event Log, is knowing what properties exactly to extract, so I can see the Person who did it, on what Machine it happened, what time the event happened. There are undoubtedly a bunch of things you might want, and the issue is many of the real gritty details are hidden in the Properties[x].Value component.

Trickier still the Account name might be Properties[6].Value in one Event Log, and then in Properties[4].Value in another.

Today we decided we wanted to add Password Changes for the Admin and Services accounts to our Audit script (Event ID 4723 and 4724 if done by the affected account, or my another account)

This script looks at roughly 20 AD Event IDs in the Security Log, so I needed to look inside or trawl the internet (once again) for what was stored where, so I could do a foreach ($event in $global:EventLogs), that would extract the accounts involved and some other details.

The Script

I’ve used my Base Menu Script (read about it here), so there is a bunch of structure in there to make it dynamic, smooth and easy to read and edit, but in the guts there are two key components:

Reading an Event Log

#------------------------------------------------------------------------------------------------
#  Do the Scan of the Targeted Event Log
#------------------------------------------------------------------------------------------------
Function Do-Scan{

    cls
    #Converts the Hours back in to Milliseconds back
    $GoTime  = $global:HoursBack*3600000
    #Create XML Filter
    $FilterSEC = '<QueryList>
                    <Query Id="0" Path="'
    $FilterSEC += $global:Events
    $FilterSEC += '">
                        <Select Path="'
    $FilterSEC += $global:Events
    $FilterSEC += '">*[System[(EventID='
    $FilterSEC += $global:EventID
    $FilterSEC += ') and TimeCreated[timediff(@SystemTime) <= ' 
    $FilterSEC += $GoTime         
    $FilterSEC += ']]]</Select>
                    </Query>
                    </QueryList>'
	
    $global:eventslog = Get-WinEvent -ComputerName $global:LogServer -FilterXml $FilterSEC	

   $ErrorActionPreference= 'continue' 
   Show-Results
    
        
}

I always do my Event queries as Get-WinEvent and -FilterXML; I find them to be the quickest to run, and you really want to lock down that filter, as you may want to target all the DCs, and when doing that you really want that filter to be targeting only the Events you actually want.

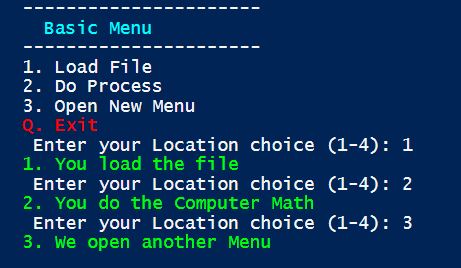
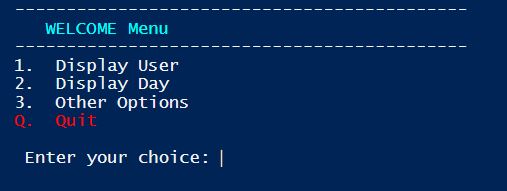
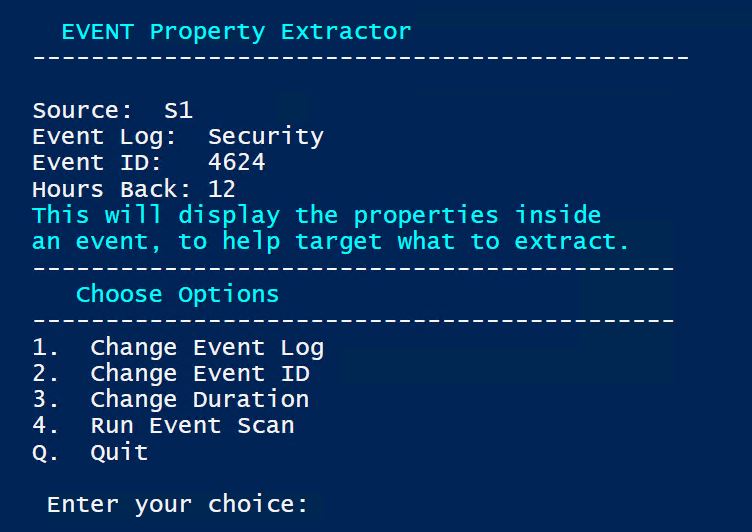
You’ll notice the $FilterSec is made up of other components that you can change from the menu as shown below:

Menu – Showing what can be changed.

Outputting all the Events Properties

#------------------------------------------------------------------------------------------------
#  Show Results in two Formats
#------------------------------------------------------------------------------------------------
Function Show-Results{

    Write-Host "     EVENT Property Extractor"  -ForegroundColor Cyan
    Write-Host "   ---------------------------------------------"
    Write-Host "  "
    Write-Host "   Source: " $global:LogServer
    Write-Host "   Event Log: " $global:Events
    Write-Host "   Event ID:  " $global:EventID
    Write-Host "   Hours Back:" $global:HoursBack

    $global:eventslog | select-object -First 1 | fl -Property * | Out-host

    $once=$true
    foreach ($e in $global:eventslog) {
        if ($once -eq $true){
            write-host "Properties[0].Value   :"$e.Properties[0].Value
            write-host "Properties[1].Value   :"$e.Properties[1].Value
            write-host "Properties[2].Value   :"$e.Properties[2].Value
            write-host "Properties[3].Value   :"$e.Properties[3].Value
            write-host "Properties[4].Value   :"$e.Properties[4].Value
            write-host "Properties[5].Value   :"$e.Properties[5].Value
            write-host "Properties[6].Value   :"$e.Properties[6].Value
            write-host "Properties[7].Value   :"$e.Properties[7].Value
            write-host "Properties[8].Value   :"$e.Properties[8].Value
            write-host "Properties[9].Value   :"$e.Properties[9].Value

            write-host "Properties[10].Value   :"$e.Properties[10].Value
            write-host "Properties[11].Value   :"$e.Properties[11].Value
            write-host "Properties[12].Value   :"$e.Properties[12].Value
            write-host "Properties[13].Value   :"$e.Properties[13].Value
            write-host "Properties[14].Value   :"$e.Properties[14].Value
            write-host "Properties[15].Value   :"$e.Properties[15].Value
            write-host "Properties[16].Value   :"$e.Properties[16].Value
            write-host "Properties[17].Value   :"$e.Properties[17].Value
            write-host "Properties[18].Value   :"$e.Properties[18].Value
            write-host "Properties[19].Value   :"$e.Properties[19].Value

            write-host "Properties[20].Value   :"$e.Properties[20].Value
            write-host "Properties[21].Value   :"$e.Properties[21].Value
            write-host "Properties[22].Value   :"$e.Properties[22].Value
            write-host "Properties[23].Value   :"$e.Properties[23].Value
            write-host "Properties[24].Value   :"$e.Properties[24].Value
            write-host "Properties[25].Value   :"$e.Properties[25].Value
            write-host "Properties[26].Value   :"$e.Properties[26].Value
            write-host "Properties[27].Value   :"$e.Properties[27].Value
            write-host "Properties[28].Value   :"$e.Properties[28].Value
            write-host "Properties[29].Value   :"$e.Properties[29].Value
        }
        $once=$false
    }
     Make-Menu -MenuTitle "Do Another?" `
    -Option1 "Yes" -Function1 "Do-Welcome" `
    -Option2 "No" -Function2 "Get-Quiting" 
}

Finally the results, which we dump the default view, and then go through 30 other possible values that could be buried in the Message part of the Event, and are often the key information you are looking for.

What it Doesn’t Do

Because this is just a tool that you will use to help you write actual functional scripts, I didn’t make it perfectly polished, or with error handling. Here’s what is doesn’t do:

  • Check if a Event ID of that type exists.
  • Restrict the Event Log selection to only valid sources.
  • Allow you to enter a Log Server source.
  • Allow you to move through a series of the Events with the full display.

Remember its a quick tool just for helping me find the properties of (in my specific case today), who’s password was changed, and who did the changing.

Download the Script

EventLog_Props.ps1 https://github.com/Works4Me-Info/PS_EventLog-Properties

Below is an example of the kind of output you would expect to see. I’ve put it at the bottom here, so it doesn’t hide the Download option.

Example Output

Personalised Email Templates – VBA

Are you sending the same email over and over again, with just a few alterations? I know I do, and one of the easiest ways is to open an oft template and then change some words.

Adding a Macro

You can use this post to see how to add macros, and how to enable a button for it:

The Solution

This is a simple two part solution:

1. The Email Template

Which has [TARGET] words that will be replaced from questions that are asked by input boxes.

2. The VBA Macro

This will open the Macro, ask you some Inputs, and then replace the [TARGET] words with what you entered in the inputs.

The Template

This is the easy part, just build an email then opt to Save As the message, as a template (*.oft). This is the example of the one used by the code. You’ll see three uses of [Gift] and one of the [Gifter] target words.

I’ve used a word inside the square brackers [TARGET]

The Code

Theres a lot you can do here, but I’ve opted for the basics – targeting words in the subject line and the body of the message.

You run the Coffee_Thanks() as a Quick Access button, which for each replacement the script calls the replaceText() sub.

Sub Coffee_Thanks()
    
    '+-+-+-+-+-+-+-+-+-+-+-+-+-+-+-+-+-+-+-+-+-+-+-+-+-+-+-+-+-+-+-+-+-+-+-+-+-+-+-+-+-+-+-+-+-+-'
    '  VARIABLES  -------------------------------------------------------------------------------'
    '+-+-+-+-+-+-+-+-+-+-+-+-+-+-+-+-+-+-+-+-+-+-+-+-+-+-+-+-+-+-+-+-+-+-+-+-+-+-+-+-+-+-+-+-+-+-'
        'DATA----------------------------------------  
        Dim CoffeeAmount As String 
        Dim personName As String 
        'TEMPLATE------------------------------------ 
        Dim newItem As Outlook.MailItem  
        'REPLACEMENTS-------------------------------- 
        Dim wdDoc As Object 
        Dim olItem As Object 
        Dim olInsp As Outlook.inspector 
    '+-+-+-+-+-+-+-+-+-+-+-+-+-+-+-+-+-+-+-+-+-+-+-+-+-+-+-+-+-+-+-+-+-+-+-+-+-+-+-+-+-+-+-+-+-+-'


    '+-+-+-+-+-+-+-+-+-+-+-+-+-+-+-+-+-+-+-+-+-+-+-+-+-+-+-+-+-+-+-+-+-+-+-+-+-+-+-+-+-+-+-+-+-+-'
    '  GATHER INFO ------------------------------------------------------------------------------'
    '+-+-+-+-+-+-+-+-+-+-+-+-+-+-+-+-+-+-+-+-+-+-+-+-+-+-+-+-+-+-+-+-+-+-+-+-+-+-+-+-+-+-+-+-+-+-'
       ' Gather additional information-------------- 
        CoffeeAmount = InputBox("Coffee Gift in $:")    
        personName = InputBox("Recipients name:")
    '+-+-+-+-+-+-+-+-+-+-+-+-+-+-+-+-+-+-+-+-+-+-+-+-+-+-+-+-+-+-+-+-+-+-+-+-+-+-+-+-+-+-+-+-+-+-'


    '+-+-+-+-+-+-+-+-+-+-+-+-+-+-+-+-+-+-+-+-+-+-+-+-+-+-+-+-+-+-+-+-+-+-+-+-+-+-+-+-+-+-+-+-+-+-'
    '  OPEN TEMPLATE ----------------------------------------------------------------------------'
    '+-+-+-+-+-+-+-+-+-+-+-+-+-+-+-+-+-+-+-+-+-+-+-+-+-+-+-+-+-+-+-+-+-+-+-+-+-+-+-+-+-+-+-+-+-+-'
        ' open Template------------------------------  
        Set newItem = Application.CreateItemFromTemplate("D:\Templates\Outlook\Coffee_Thanks.oft")
        newItem.Display
    '+-+-+-+-+-+-+-+-+-+-+-+-+-+-+-+-+-+-+-+-+-+-+-+-+-+-+-+-+-+-+-+-+-+-+-+-+-+-+-+-+-+-+-+-+-+-'


    '+-+-+-+-+-+-+-+-+-+-+-+-+-+-+-+-+-+-+-+-+-+-+-+-+-+-+-+-+-+-+-+-+-+-+-+-+-+-+-+-+-+-+-+-+-+-'
    '  TEXT REPLACEMENTS ------------------------------------------------------------------------'
    '+-+-+-+-+-+-+-+-+-+-+-+-+-+-+-+-+-+-+-+-+-+-+-+-+-+-+-+-+-+-+-+-+-+-+-+-+-+-+-+-+-+-+-+-+-+-'
       ' Set up for changes-------------------------  
		   ' Word Swaps in Subject line-----------------  
				Set olInsp = Application.ActiveInspector  
				Set olItem = olInsp.currentItem  
			 ' Word swaps in Body--------------------------
				Set wdDoc = newItem.GetInspector.WordEditor 

		   ' Replace all placeholders-------------------   
        olItem.Subject = Replace(olItem.Subject, "[Gift]", CoffeeAmount) 
        Call replaceText(wdDoc, "[Gifter]", personName)
        Call replaceText(wdDoc, "[Gift]", CoffeeAmount)
    '+-+-+-+-+-+-+-+-+-+-+-+-+-+-+-+-+-+-+-+-+-+-+-+-+-+-+-+-+-+-+-+-+-+-+-+-+-+-+-+-+-+-+-+-+-+-'
    
End Sub

Sub replaceText(wdDoc As Object, findText As String, replaceText As String)
	'+-+-+-+-+-+-+-+-+-+-+-+-+-+-+-+-+-+-+-+-+-+-+-+-+-+-+-+-+-+-+-+-+-+-+-+-+-+-+-+-+-+-+-+-+-+-'
    '+-+-+-+-+-+-+-+-+-+-+-+-+-+-+-+-+-+-+-+-+-+-+-+-+-+-+-+-+-+-+-+-+-+-+-+-+-+-+-+-+-+-+-+-+-+-'
    ' Repeatable loop to replace words in the body, without altering
    ' the HTML formatting.
	'+-+-+-+-+-+-+-+-+-+-+-+-+-+-+-+-+-+-+-+-+-+-+-+-+-+-+-+-+-+-+-+-+-+-+-+-+-+-+-+-+-+-+-+-+-+-'
    With wdDoc.Content.Find
        .Text = findText
        .Replacement.Text = replaceText
        .Execute Replace:=2 ' 2 = Replace all
    End With
End Sub

NOTE: I’ve saved my oft template to “D:\Templates\Outlook\Coffee_Thanks.oft”, you will need to change the code to point to where ever you have saved the template.

There’s a mountain different ways to use this, and you can do various other things like:

  • Calculate the time of day to tweak the greating to a good morning, or afternoon.
  • Find out when the next weekend is, because you’re using this to warn about patching.
  • Add people to the CC or BC fields.
  • Use input choices to add different content.

Download the Code

WordReplacement.vb https://github.com/Works4Me-Info/Outlook-Macros

Over Document your Code

I get the desire to skip documenting, it’s not the fun part, and besides the code is self documented… right?

Look, I’m inherently lazy. Which means I don’t want to figure out how this works in a years time when I need to tweak it, or reinvent the wheel when I want to do something similar again. This is why I use OneNote to keep my own Knowledge Base for any task I do at work, and why I over document all my code.

Tip One: Seperate Sections

Use a Standard Sectioning to allow you to move around the code – and make those comments really distinct so it doesn’t get blurred into the code:

# Created by Works4me.info

#############--------------------------------------------------#
#############                                                  #  All the Global variables that you will
#############             +-+-+-+-+-+-+-+-+-+                  #  call in the rest of the code.
#############             |V|a|r|i|a|b|l|e|s|                  #
#############             +-+-+-+-+-+-+-+-+-+                  #  Sometime this might execute stuff, so
#############                                                  #  think of this as a setup section too.
#############--------------------------------------------------#  --------------------------------------

$global:Today = Get-Date
$global:AddDescription = $True

#VERSION OUTPUT DATA
$global:Version = "2.0"
$global:VersionDate = "1/2/2025"


#############--------------------------------------------------#
#############                                                  #  The Functions that are repeatedly used  
#############          +-+-+-+-+-+-+-+-+-+-+-+-+-+-+           #  by rest of the code, think of these
#############          |C|o|r|e| |F|u|n|c|t|i|o|n|s|           #  as Functions used by Functions.
#############          +-+-+-+-+-+-+-+-+-+-+-+-+-+-+           #  --------------------------------------
#############                                                  #  
#############--------------------------------------------------#  


#---------------------------------------------------------------------------------------------
#    Base Menu                     
#---------------------------------------------------------------------------------------------
function Make-Menu {
    
    # This is a really big function
    # and could distract from the point
    # if it's in here.


}


#############--------------------------------------------------#
#############                                                  #  The Various unique Functions 
#############            +-+-+-+-+-+-+-+-+-+-+-+-+             #  that do the fancy pants part
#############            |D|o| |F|u|n|c|t|i|o|n|s|             #  and navigation of your code.
#############            +-+-+-+-+-+-+-+-+-+-+-+-+             #  ----------------------------
#############                                                  #  
#############--------------------------------------------------#  


#---------------------------------------------------------------------------------------------
#    Welcome Menu calling
#---------------------------------------------------------------------------------------------
function Do-Welcome {
    
    cls
    Make-Menu -OptionQuit -MenuTitle "WELCOME Menu" `
    -Option1 "Display User" -Function1 "Do-Main01" `
    -Option2 "Display Day" -Function2 "Do-Main02" `
    -Option3 "Other Options" -Function3 "Do-SubMenu"
}


#############--------------------------------------------------#
#############                                                  #  Simply the section in which
#############             +-+-+-+-+-+-+-+-+-+-+-+              #  you call all the functions &
#############             |R|u|n| |S|e|c|t|i|o|n|              #  excute the core part of the
#############             +-+-+-+-+-+-+-+-+-+-+-+              #  code.
#############                                                  #  ----------------------------
#############--------------------------------------------------# 

#### Load the initial Menu
Do-Welcome

#---------------------------------------------------------------------------------------------

When you look at the above code you see the skeleton of every PowerShell Script I write. Big block section markers, and banners for every individual Function.

  • Variables
  • Core Functions
  • Do Functions
  • Run Section

Tip Two: Side Notes

 # Take action based on user input
     switch ($choice01) {
        1 {
            if($Option1 -ne ""){                    #--------------------------------------
               cls                                  # Note: Every choice will end the Menu
               $test = & $Function1.ToString()      # by setting $Choice01 to "Q".
               $choice01="Q"                        # This means wherever you go, you
            }                                       # need to Call this Function again.
        }                                           #--------------------------------------
        2 {
            if($Option2 -ne ""){
               cls       
               $test = & $Function2.ToString()
               $choice01="Q"
            }
        }

It might be annoying to add, but Notes like this stand out and are easy to read and spot when you are reviewing the code later.

Pro Tip: If you use Notepad++, you can hold ‘ALT’ and select any section to insert a column of comment characters.

Tip Three: Use Ascii Art to build those funky sections

I don’t have the time or inclination to manually create those Sections, so reuse what you can and build that template with an online Ascii Art generator like https://it-tools.tech/ascii-text-drawer

Tip Four: Explain Everything

#Check for Group Membership for each ($Group in $global:Groups.Groups) {
    # Group does not exist in AD
    if ($ADGroups.SamAccountName -notcontains $Group) {
        Write-Host "    $Group group does not exist in AD" -ForegroundColor Red
        Continue
    }
    
    # User is already a member of the group
    if ($ExistingGroups.SamAccountName -eq $Group) {
        Write-Host "    $UserSam already exists in group $Group" -ForeGroundColor Yellow
    } else { # Add user to to group    
        Add-ADGroupMember -Identity $Group -Members $UserSam
        Write-Host "    Added $UserSam to $Group" -ForeGroundColor Green
    }
}

The code might be self explanatory, but with the comments it allow you to decipher the intention without having to interpret all of the code. This will means you can find the section you want to review or understand quickly.

Notice how I’ve attempted to blend the comment into the code, you could for example read:

“User is already a member of the group if SamAccount name equals $Group”

“Else add the user to the group”

Why this Matters

Future you will thank present you for these extra 10 minutes of documentation. When you’re troubleshooting at 2 AM or your colleague needs to modify your script, those comments become the difference between ‘genius!‘ and ‘what was I thinking?

Dynamic Menus – PowerShell

When you’re writing a PowerShell script as a tool, you’ll probably want to put in a Menu at some point, allowing for options and user input.

This works well at first, and you’ll use this little While / Switch version (a select statement in the old VBS days) over an over again in lots of different places of your script, and lot of different scripts.

Basic Menu

Function Do-Menu_01 {
    cls
    $x=1

    Write-Host "   ----------------------"
    Write-Host "     Basic Menu"
    Write-Host "   ----------------------"
    Write-Host "   1. Load File"
    Write-Host "   2. Do Process"
    Write-Host "   3. Open New Menu"
    Write-Host "   Q. Exit"
    
    $choice = 0
    
    while ($choice -ne "Q") {
        $choice = Read-Host "    Enter your Location choice (1-3)"

        # Take action based on user input
        switch ($choice) {
            1 { 
                Write-Host "   1. You load the file"
              }
            2 { 
                Write-Host "   2. You do the Computer Math"
                $x=$x+2
                $y=$x*2
              }
            3 { 
                Write-Host "   3. We open another Menu"
                $choice = "Q"
                Do-Menu_02
              }
            "q"{
                $choice = "Q"
               }
            "Q" { Exit }
            default { Write-Host "Invalid option. Please try again."; continue }
        }
    }
}

Building something like this:

Basic Menu in action (with added foreground color not in the code)

This works great on a small scale, and you could use the same menu code several times, and even have some code buried in that Switch section, or call functions that then do bits and pieces. As this script grows, going in and tweaking it, adding to it, and troubleshooting it will eventually become a nightmare.

Worse yet, you might even try to bury one Menu inside another as a sub menu, so you can exit one and come back into the first. Trust me, this is a disaster waiting to happen.

My scripts were getting so big, I needed to build a more dynamic and stable way of doing things. So the Make-Menu Function was born, and it changed my scripts forever. You can just tell it what you want the menu to have, and what separate function it should run for each option.

This means every function that has a menu, just has this simple bit of code to build the menu at the bottom.

The Dynamic Menu Function

function Make-Menu {
    
    # You can add more, but this allow an initial
    # 6 options, a quit menu, and the option to 

    param (
        [string]$MenuTitle = $null,
        [string]$Option1 = $null,
        [string]$Function1 = $null,
        [string]$Option2 = $null,
        [string]$Function2 = $null,
        [string]$Option3 = $null,
        [string]$Function3 = $null,
        [string]$Option4 = $null,
        [string]$Function4 = $null,
        [string]$Option5 = $null,
        [string]$Function5 = $null,
        [string]$Option6 = $null,
        [string]$Function6 = $null,
        [Switch]$OptionQuit
    )


    # This prevents the Colour bleeds while in Powershell ISE.
    # You won't need this in a normal Powershell Console.
    #---------------------------------------------------------
    # Start-Sleep -Seconds 1

    Write-Host "   --------------------------------------------"
    Write-Host "     " $MenuTitle -ForegroundColor Cyan
    Write-Host "   --------------------------------------------"
    if($Option1 -ne ""){
        Write-Host "   1. " $Option1
    }
    if($Option2 -ne ""){
        Write-Host "   2. " $Option2
    }
    if($Option3 -ne ""){
        Write-Host "   3. " $Option3
    }
    if($Option4 -ne ""){
        Write-Host "   4. " $Option4
    }
    if($Option5 -ne ""){
        Write-Host "   5. " $Option5
    }
    if($Option6 -ne ""){
        Write-Host "   6. " $Option6
    }
    if($OptionQuit -eq $true){
        Write-Host "   Q.  Quit" -ForegroundColor Red
    }
    Write-Host " " 

    $choice01 = 0
    while ($choice01 -ne "Q") {
        $choice01 = Read-Host "    Enter your choice"

        # Take action based on user input
        switch ($choice01) {
            1 { 
                if($Option1 -ne ""){                       #--------------------------------------
                    cls                                    #  Note: Every choice will end the Menu
                    $test = & $Function1.ToString()        #  by setting $Choice01 to "Q".
                    $choice01="Q"                          #  This means wherever you go, you 
                }                                          #  need to Call this Function again.
              }                                            #--------------------------------------
            2 { 
                if($Option2 -ne ""){
                    cls                    
                    $test = & $Function2.ToString()
                    $choice01="Q"
                } 
              }
            3 { 
                if($Option3 -ne ""){
                    cls                    
                    $test = & $Function3.ToString()
                    $choice01="Q"
                } 
              }
            4 { 
                if($Option4 -ne ""){
                    cls                    
                    $test = & $Function4.ToString()
                    $choice01="Q"
                } 
              }
            5 { 
                if($Option5 -ne ""){
                    cls                    
                    $test = & $Function5.ToString()
                    $choice01="Q"
                } 
              }

            6 { 
                if($Option6 -ne ""){
                    cls                    
                    $test = & $Function6.ToString()
                    $choice01="Q"
                }
              }
            # The final conditions are for Quitting, and it changes a 
            # lower case "q" into a "Q", so that you use the default quit
            "q" { 
                $choice01="Q"
              }
            "Q" { Get-Quiting }
            default { Write-Host "Invalid option. Please try again." -foregroundcolor red; continue }
        }
    }
}

Lets look at how this works, with an example function ‘Do-Welcome””

function Do-Welcome {
     
    cls
    Make-Menu -OptionQuit -MenuTitle "WELCOME Menu" `
    -Option1 "Display User" -Function1 "Do-Main01" `
    -Option2 "Display Day" -Function2 "Do-Main02" `
    -Option3 "Other Options" -Function3 "Do-SubMenu"
}

As you can see you can just include a quit option, a menu title and then the Options you want along with the an associated Function.

The above Do-Welcome function would look like this (you can see the title function was included when I ran this)

So then lets look at three functions it will call:

#-------------------------------------------------------------------------------------------------
####    Main Option 1 
#-------------------------------------------------------------------------------------------------
Function Do-Main01{
     
    Do-Option01
    Write-Host "  This will reuse the Do-Welcome function"
    Pause
    Do-Welcome
}
 
#-------------------------------------------------------------------------------------------------
####    Main Option 2 
#-------------------------------------------------------------------------------------------------
Function Do-Main02{
     
    Write-Host " "
    Write-Host "  Today is" $global:Today -ForegroundColor Green
    Write-Host "  This will REBUILD the Do-Welcome Menu"
    Pause
    cls
    Make-Menu -OptionQuit -MenuTitle "WELCOME Menu" `
        -Option1 "Display User" -Function1 "Do-Main01" `
        -Option2 "Display Day" -Function2 "Do-Main02" `
        -Option3 "Other Options" -Function3 "Do-SubMenu"
}
 
#-------------------------------------------------------------------------------------------------
####    Sub Menu Option 3 
#-------------------------------------------------------------------------------------------------
Function Do-SubMenu{

    # This checks if you should add the Description or not
    # which isn't important to the script, but just demonstrates 
    # what you can do, to control the GUI
    if ($global:AddDescription -eq $False){
            # It will reset it to always show,
            # so you need to decide to hide it
            $global:AddDescription = $True
    }Else{
        Write-Host "  "
        Write-Host "     Some additional Section or Function"  -ForegroundColor Cyan
        Write-Host "   -------------------------------------------------"
        Write-Host "  "
        Write-Host "   This would be where you add something special or"
        Write-Host "   maybe you run / call a bunch of other functions,"
        Write-Host "   but thats really up to you."
        Write-Host "  "
        Write-Host "  "
        Write-Host "   The real key is to watch where you use the " -NoNewline
        Write-Host "cls" -ForegroundColor Green
        Write-Host "   code, so that the Menu sits under the data you "
        Write-Host "   have displayed, like so:"
    }
    Write-Host "  "
    Make-Menu -MenuTitle "Sub Structure" `
        -Option1 "Display User" -Function1 "Do-Sub01" `
        -Option2 "Display Day" -Function2 "Do-Sub02" `
        -Option3 "Reload the Description" -Function3 "Do-Sub03" `
        -Option4 "Main Menu " -Function4 "Do-Welcome"
}

As you can see you just call Functions as the Menu choices, and you can use reuse Functions to build repeated menus or build the Menus on the fly.

The point is, the menu aspect becomes very simple and easy to update and change.

I personally like having functions for the repeated Menus. Like we see in Do-Main01, it just calls the Do-Welcome Menu.

Traps to Lookout for

  • When you call the menu function, if you are doing it like I do on multiple lines (so it’s easier to read), remember to put the ” ` ” character at the end of the line in which another line follows.
  • Make sure your Options and Functions line up number wise and make sense. Don’t use Option 1,2,4 & 6.

Download the Script

Base_Menu_2.0.ps1 https://github.com/Works4Me-Info/PS_Menu