Posts tagged email

Outlook Reply Macro – VBA

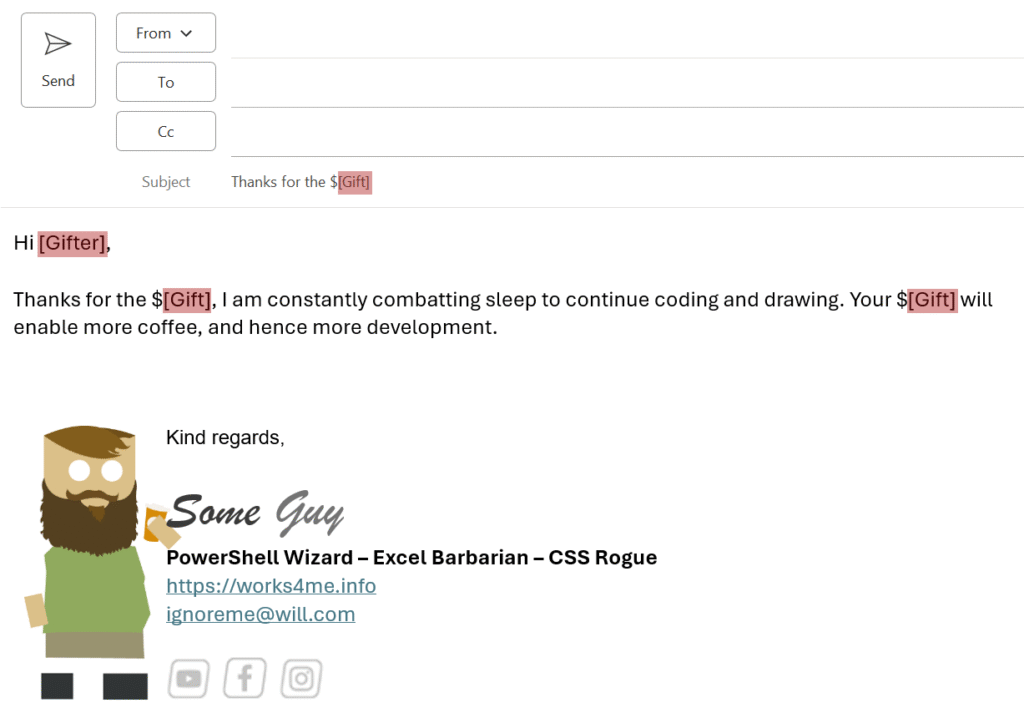
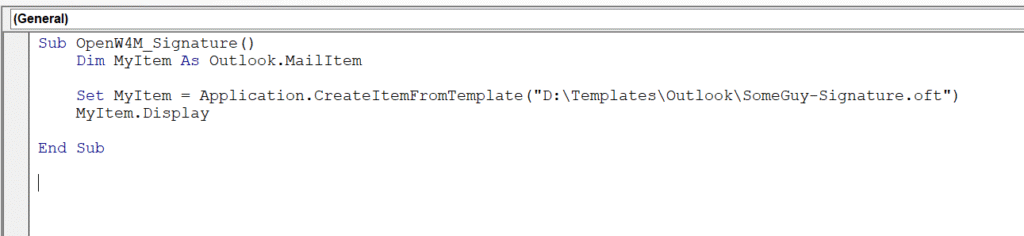
This is in all honesty, is my most useful piece of automation, and it came in part because where I work we have an older version of Outlook, and I couldn’t use the Auto-Reply add-in “My Templates“. But I do have that same pain point that would warranty the need for that add in – really common questions via email, that I tire of retyping or searching for the last time I typed it to copy, paste then personalize.

Instead I added a little Macro (it’s actually a mid size one for me), that:

  • Gives me the options of custom replies
  • Asks me who I’m replying to
    • Adds a greeting based on the time of day
  • Injects the reply at the top of the email, and will even include up to one of each of the following
    • Embedded image
    • Attachment
      • You could always have sperate macros just to add attachments, or groups of

From there you might want to do some formatting – it is just injecting text (not formatting), so I go to any link and put a space right after it so it will automatically turn into a link, and other bits and bobs.

The Prequel

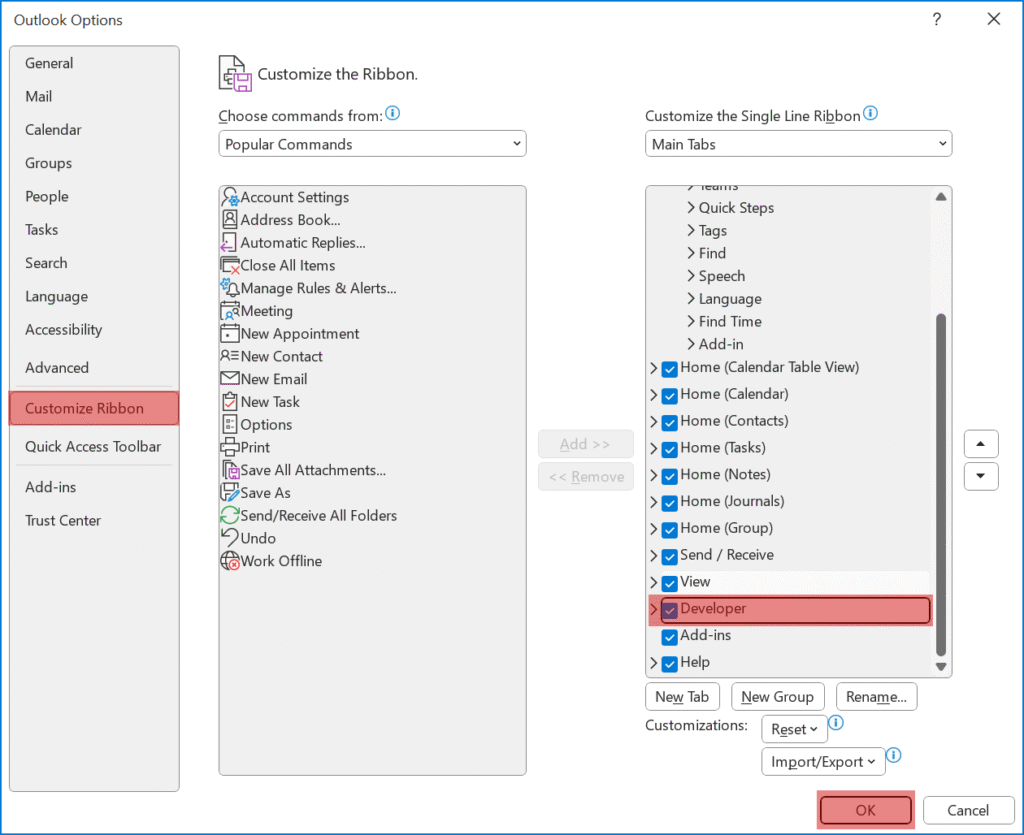
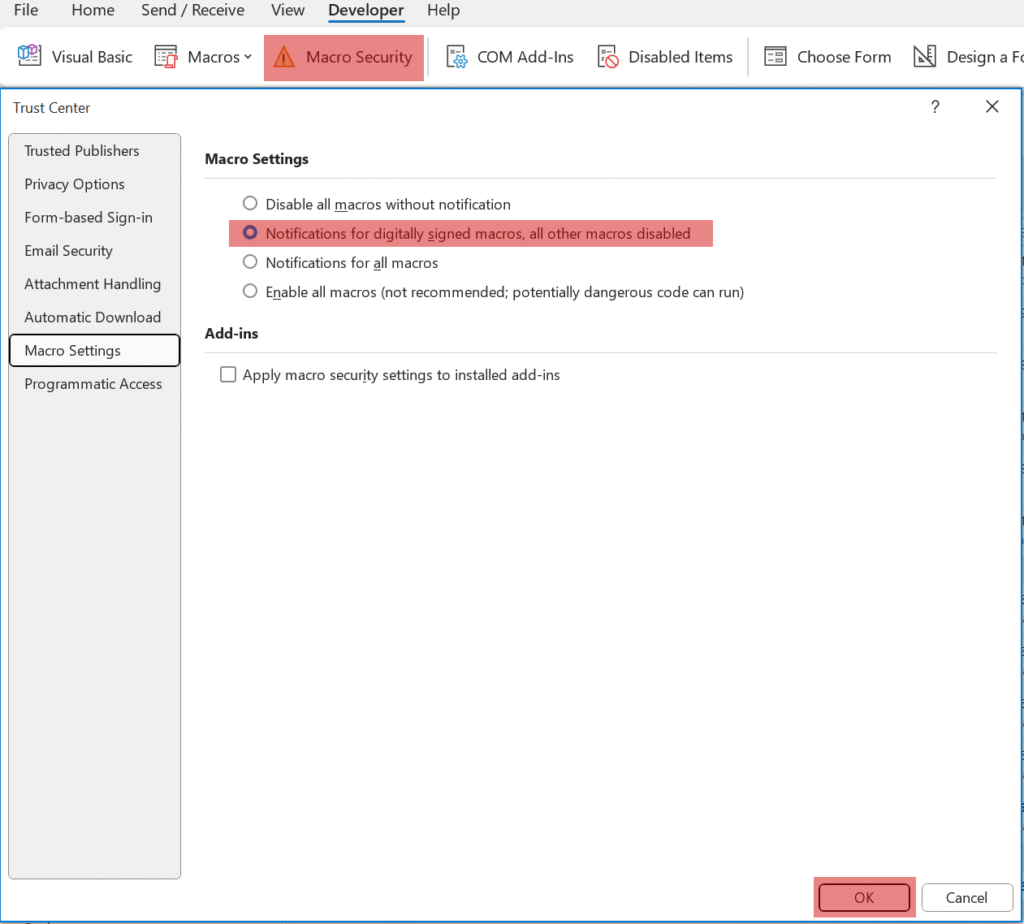
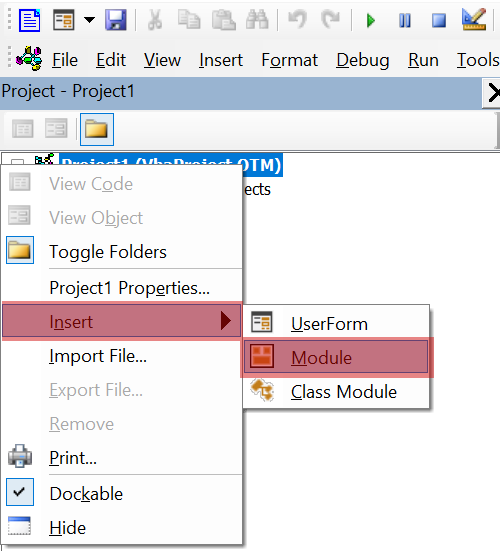
Before we jump to far in, this post is going to assume you know how to add a Macro and the shortcut to run it from Outlook. If not, then this post will help you through that:

The Code

There are some basic elements to this macro, and you can expand them to what ever scale you need. So lets look at the “components” one by one:

Collecting the Inputs

First we need to collect a few details, initially which email response you want and then a name for the reply greeting:

    '-----------------------------------------------------------------  +-+-+-+-+-+-+-+-+-+-+-+-+
    ' COLLECT REPOSPONSE CHOICE                                         +-+-+-+-+-+-+-+-+-+-+-+-+
    '-----------------------------------------------------------------  +-+-+-+-+-+-+-+-+-+-+-+-+

    responseChoice = InputBox("Choose response type:" & vbCrLf & vbCrLf & _
                             "[1] - Password Reset" & vbCrLf & _
                             "[2] - Project Access." & vbCrLf & _
                             "[3] - Software Installation" & vbCrLf & _
                             "[4] - Wrong Support" & vbCrLf & _
                             "Enter number (1-4):", "Email Response Template")                                                            
    ' Validate input                                                                                                                      
    If responseChoice = "" Or Not IsNumeric(responseChoice) Or Val(responseChoice) < 1 Or Val(responseChoice) > 4 Then 
        MsgBox "Invalid selection. Please run again and choose 1-4."  
        Exit Sub   
    End If   
    
    ' Get person's name  
    personName = InputBox("Enter the person's name (or leave blank for generic greeting):", "Recipient Name")  
    If personName = "" Then   
        personName = "there"  
    End If     

you’ll notice, that you can just press enter to speed through the second question, and the default “there” will be added for a “good morning there” or “good evening there“.

Generating that Greeting

This might not look like much (and it’s not), but this reusable beauty is what makes the that personalized response have a little polish. “Good Morning Dave” , is Personal, Polite, and Timely. A three factor illusion to makes it more than an automatic response.

    '-----------------------------------------------------------------  +-+-+-+-+-+-+-+-+-+-+-+-+
    ' GENERATE GREETING                                                 +-+-+-+-+-+-+-+-+-+-+-+-+
    '-----------------------------------------------------------------  +-+-+-+-+-+-+-+-+-+-+-+-+
    Dim timeGreeting As String 
    Select Case Hour(Now)   
        Case 5 To 11      
            timeGreeting = "Morning"   
        Case 12 To 17      
            timeGreeting = "Afternoon"  
        Case 18 To 21     
            timeGreeting = "Evening"  
        Case Else       
            timeGreeting = "Day" ' For very early morning/late night  
    End Select     

The Responses

Time to add the custom responses, you can build as many as you need – it injects itself at the top of the email

    '-----------------------------------------------------------------  +-+-+-+-+-+-+-+-+-+-+-+-+
    ' GENERATE RESPONSES                                                +-+-+-+-+-+-+-+-+-+-+-+-+
    '-----------------------------------------------------------------  +-+-+-+-+-+-+-+-+-+-+-+-+
    '
    '   attachmentPath="X:\Location\File.txt" will include a single attachment
    '   imagePath:="X:\Location\Picture.png" will include the picture in the [IMAGE] line 
    '                                        NOTE: you can only have one image
    '--------------------------------------------------------------------------------------------
    
    Select Case Val(responseChoice)
        Case 1 ' PASSWORD RESET
           responseText = "Good " & timeGreeting & " " & personName & "," & vbCrLf & vbCrLf & _
                          "We don't reset passwords manually for the Fantasy domain, and instead have a password portal that you can use to  reset your password from the the real world." & vbCrLf & vbCrLf & _
                          " Just follow this link, and enter you Fantasy username, and click submit: " & _
                          "https://FantasyCan.Works4Me.info" & vbCrLf & vbCrLf & _
                          " You will then recieve an email like below:" & vbCrLf & vbCrLf & _
                          "[IMAGE]" & vbCrLf & _
                          " Clicking the 'Yes please' button will take you to the password rest portal." 
            imagePath = "X:\location\Email_Example.png" 
        Case 2 ' PROJECT ACCESS                                                                                             
           responseText = "Good " & timeGreeting & " " & personName & "," & vbCrLf & vbCrLf & _
                           "Request to access the Fantasy project are done though a request portal, and not email." & vbCrLf & vbCrLf & _
                           " Simply go to " & _
                           "https://FantasyCan.Works4Me.info" & _
                           " and fill in the forms. I've also attached the Induction Guide so you know what to expect." & vbCrLf & vbCrLf & _
                           "Please read the guide before yo apply, as the Fantasy Domain may not be for you, and its resources are limited."
           attachmentPath = "X:\location\You and the Fantasy Guide.pdf"

        Case 3 ' SOFTWARE
           responseText = "Good " & timeGreeting & " " & personName & "," & vbCrLf & vbCrLf & _
                           "We utilise a self service portal that will display all the software available to you based on your departmental water cooler structure." & vbCrLf & _
                           "https://WillSoftware.Work4Me.info" & vbCrLf & vbCrLf & _
                           "If you can't find the software you want on the Self Service portal, then chances are you don't have the correct proximity to one or more water coolers." & vbCrLf & vbCrLf & _
                           "If in doubt, just check the Water Cooler map, and swap office with someone with better proximity " & vbCrLf & vbCrLf & _
                           "https://MoreWater.works4me.info"
        
        Case 4 ' OTHER GROUP
           responseText = "Good " & timeGreeting & " " & personName & "," & vbCrLf & vbCrLf & _
                          "I'm sorry to say that we don't operate the DarkFantasy domain. This is something you can discuss with ignoreme@will.com for such things, who I've CC'd into this response." & vbCrLf & vbCrLf & _
                          "I've attached the joys you could have with regular fantasy in our promotional pdf. If that doesn't move you, please consider this sad kitten meme below" & vbCrLf & vbCrLf & _
                          "[IMAGE]"
            ccEmail = "ignoreme@will.com"
            attachmentPath = "X:\location\The Fantasy for Everyone.pdf"
            imagePath = "X:\location\Sad Kitten.png"


    End Select

I do a basic trick here – where things are blank to begin with, and if a value is entered then the code will know to use the value in following sections.

You’ll notice the [IMAGE] bit can sit anywhere, and will be replaced by the value in imagePath.

Although I don’t do it above, you could use “imageScale” to scale the image as a percent if you require different sizing:

imagePath = "X:\location\Sad Kitten.png"
imageScale = 100

Add the Text and maybe an Image

This is the true guts of the code, to “do-section” – here we inject the message, but first if an image exists, it splits the text on that point and adds the image. This allows you to have the image first or last as well; but this code only allows for one image max as written.

    '-----------------------------------------------------------------  +-+-+-+-+-+-+-+-+-+-+-+-+
    ' INSERT IMAGE                                                      +-+-+-+-+-+-+-+-+-+-+-+-+
    '-----------------------------------------------------------------  +-+-+-+-+-+-+-+-+-+-+-+-+
    '
    ' This checks if the generated responseText include "[IMAGE]" then it will spit the 
    '  responseTest on that,and includes the image from the associated imagePath variable.
    '
    '--------------------------------------------------------------------------------------------
    If InStr(responseText, "[IMAGE]") > 0 Then
        ' Split text at image placeholder
        Dim beforeImage As String
        Dim afterImage As String
        Dim imagePos As Integer
        
        imagePos = InStr(responseText, "[IMAGE]")
        beforeImage = Left(responseText, imagePos - 1)
        afterImage = Mid(responseText, imagePos + 7) ' 7 = str length of "[IMAGE]"
        
        ' Insert text after image
        wdRange.InsertAfter afterImage & vbCrLf & vbCrLf
        
        If Dir(imagePath) <> "" Then
            wdRange.InsertAfter vbCrLf
            wdRange.Collapse Direction:=1
            
            ' Insert the image
            Dim inlineShape As Object
            Set inlineShape = wdRange.InlineShapes.AddPicture(imagePath, False, True)
            
            ' Optional: Resize image (adjust as needed)
            With inlineShape
                .ScaleHeight = imageScale ' % of original size    
                .ScaleWidth = imageScale  ' % of original size
            End With  
                                                                         
            wdRange.Collapse Direction:=1
            wdRange.InsertAfter vbCrLf
            wdRange.Collapse Direction:=1
        End If
        '----------------------------------------
        ' Insert text before image
        wdRange.InsertAfter beforeImage
        wdRange.Collapse Direction:=1 ' Move to end of inserted text
        '----------------------------------------
        
    Else
        ' No image, just insert text normally
        wdRange.InsertAfter responseText & vbCrLf & vbCrLf
    End If

Adding an Attachment

If you’ve opted for one, this bit of code adds an attachment. This is that bit I talked about having something empty by default, but if you do add something, then the code reacts.

    '-----------------------------------------------------------------  +-+-+-+-+-+-+-+-+-+-+-+-+
    ' ADD ATTACHMENT                                                    +-+-+-+-+-+-+-+-+-+-+-+-+
    '-----------------------------------------------------------------  +-+-+-+-+-+-+-+-+-+-+-+-+
    '
    ' This checks if you've included an attachment, and if so, adds it.
    '
    '--------------------------------------------------------------------------------------------
    If attachmentPath <> "" Then
        If Dir(attachmentPath) <> "" Then
            olItem.Attachments.Add attachmentPath
        End If
    End If

Finally adding to the CC

This is the latest addition, and was a request by a colleague. It effectively check if the email address is already in the TO or CC, then adds it to the CC if required

    '-----------------------------------------------------------------  +-+-+-+-+-+-+-+-+-+-+-+-+
    ' ADD Email to CC                                                   +-+-+-+-+-+-+-+-+-+-+-+-+
    '-----------------------------------------------------------------  +-+-+-+-+-+-+-+-+-+-+-+-+
    '
    ' This checks if you're ensuring an email address is included
    '
    '--------------------------------------------------------------------------------------------
     If ccEmail <> "" Then
        If InStr(LCase(olItem.To), LCase(ccEmail)) = 0 Then
            If InStr(LCase(olItem.CC), LCase(ccEmail)) = 0 Then
                ' Email not found in CC field
                If olItem.CC = "" Then
                    olItem.CC = ccEmail
                Else
                    olItem.CC = olItem.CC & "; " & ccEmail
                End If
            End If
        End if
    End if

Warning Note!

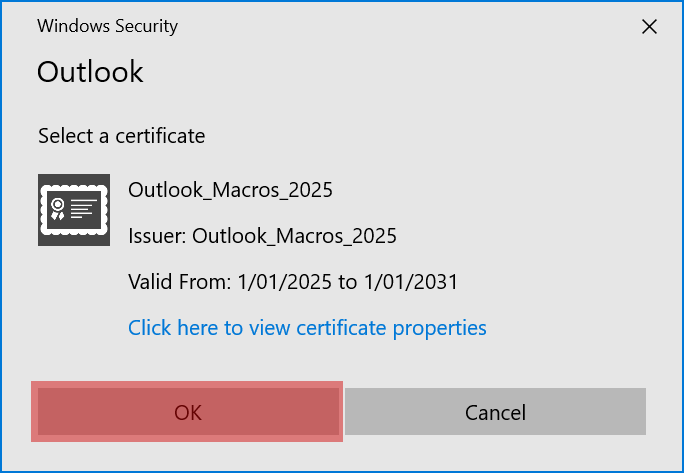
This macro runs only in a popped out email – you can’t run this from the viewing pane of Outlook. That’s why I’d recommend setting the shortcut to the macro as part of a popped out email, not Outlook it self – that being said, there is a check at the top to warn you:

    ' Check if we're in an active email
    Set currentInspector = Application.ActiveInspector
    If currentInspector Is Nothing Then
        MsgBox "Please open an email in its own window."
        Exit Sub
    End If

What it Doesn’t Do

Like all my solutions, these aren’t things I’ve written because I think you could use them, or because it might attract traffic to this site. These are the solutions I use to make my IT day smoother and easier. Which unfortunately means they can fall short of the perfect solution, for the functional one I needed. Here what you could add:

  • Handle Multiple Attachments
  • Additional word swaps to add customized responses
    • Another numbered set to add certain sub responses
    • Search for other bits to swap out like the department or other detail
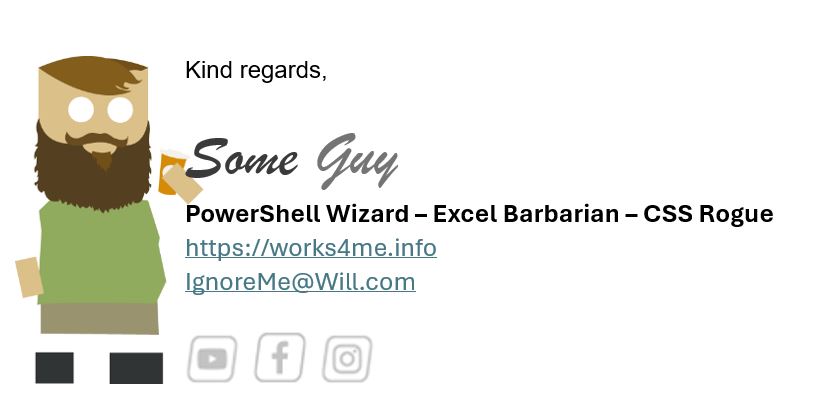
  • Inject a specialized signature – or even options of signatures.

Download the Macro

Reply Options.vba https://github.com/Works4Me-Info/Outlook_Automatic_Replies

Personalised Email Templates – VBA

Are you sending the same email over and over again, with just a few alterations? I know I do, and one of the easiest ways is to open an oft template and then change some words.

Adding a Macro

You can use this post to see how to add macros, and how to enable a button for it:

The Solution

This is a simple two part solution:

1. The Email Template

Which has [TARGET] words that will be replaced from questions that are asked by input boxes.

2. The VBA Macro

This will open the Macro, ask you some Inputs, and then replace the [TARGET] words with what you entered in the inputs.

The Template

This is the easy part, just build an email then opt to Save As the message, as a template (*.oft). This is the example of the one used by the code. You’ll see three uses of [Gift] and one of the [Gifter] target words.

I’ve used a word inside the square brackers [TARGET]

The Code

Theres a lot you can do here, but I’ve opted for the basics – targeting words in the subject line and the body of the message.

You run the Coffee_Thanks() as a Quick Access button, which for each replacement the script calls the replaceText() sub.

Sub Coffee_Thanks()
    
    '+-+-+-+-+-+-+-+-+-+-+-+-+-+-+-+-+-+-+-+-+-+-+-+-+-+-+-+-+-+-+-+-+-+-+-+-+-+-+-+-+-+-+-+-+-+-'
    '  VARIABLES  -------------------------------------------------------------------------------'
    '+-+-+-+-+-+-+-+-+-+-+-+-+-+-+-+-+-+-+-+-+-+-+-+-+-+-+-+-+-+-+-+-+-+-+-+-+-+-+-+-+-+-+-+-+-+-'
        'DATA----------------------------------------  
        Dim CoffeeAmount As String 
        Dim personName As String 
        'TEMPLATE------------------------------------ 
        Dim newItem As Outlook.MailItem  
        'REPLACEMENTS-------------------------------- 
        Dim wdDoc As Object 
        Dim olItem As Object 
        Dim olInsp As Outlook.inspector 
    '+-+-+-+-+-+-+-+-+-+-+-+-+-+-+-+-+-+-+-+-+-+-+-+-+-+-+-+-+-+-+-+-+-+-+-+-+-+-+-+-+-+-+-+-+-+-'


    '+-+-+-+-+-+-+-+-+-+-+-+-+-+-+-+-+-+-+-+-+-+-+-+-+-+-+-+-+-+-+-+-+-+-+-+-+-+-+-+-+-+-+-+-+-+-'
    '  GATHER INFO ------------------------------------------------------------------------------'
    '+-+-+-+-+-+-+-+-+-+-+-+-+-+-+-+-+-+-+-+-+-+-+-+-+-+-+-+-+-+-+-+-+-+-+-+-+-+-+-+-+-+-+-+-+-+-'
       ' Gather additional information-------------- 
        CoffeeAmount = InputBox("Coffee Gift in $:")    
        personName = InputBox("Recipients name:")
    '+-+-+-+-+-+-+-+-+-+-+-+-+-+-+-+-+-+-+-+-+-+-+-+-+-+-+-+-+-+-+-+-+-+-+-+-+-+-+-+-+-+-+-+-+-+-'


    '+-+-+-+-+-+-+-+-+-+-+-+-+-+-+-+-+-+-+-+-+-+-+-+-+-+-+-+-+-+-+-+-+-+-+-+-+-+-+-+-+-+-+-+-+-+-'
    '  OPEN TEMPLATE ----------------------------------------------------------------------------'
    '+-+-+-+-+-+-+-+-+-+-+-+-+-+-+-+-+-+-+-+-+-+-+-+-+-+-+-+-+-+-+-+-+-+-+-+-+-+-+-+-+-+-+-+-+-+-'
        ' open Template------------------------------  
        Set newItem = Application.CreateItemFromTemplate("D:\Templates\Outlook\Coffee_Thanks.oft")
        newItem.Display
    '+-+-+-+-+-+-+-+-+-+-+-+-+-+-+-+-+-+-+-+-+-+-+-+-+-+-+-+-+-+-+-+-+-+-+-+-+-+-+-+-+-+-+-+-+-+-'


    '+-+-+-+-+-+-+-+-+-+-+-+-+-+-+-+-+-+-+-+-+-+-+-+-+-+-+-+-+-+-+-+-+-+-+-+-+-+-+-+-+-+-+-+-+-+-'
    '  TEXT REPLACEMENTS ------------------------------------------------------------------------'
    '+-+-+-+-+-+-+-+-+-+-+-+-+-+-+-+-+-+-+-+-+-+-+-+-+-+-+-+-+-+-+-+-+-+-+-+-+-+-+-+-+-+-+-+-+-+-'
       ' Set up for changes-------------------------  
		   ' Word Swaps in Subject line-----------------  
				Set olInsp = Application.ActiveInspector  
				Set olItem = olInsp.currentItem  
			 ' Word swaps in Body--------------------------
				Set wdDoc = newItem.GetInspector.WordEditor 

		   ' Replace all placeholders-------------------   
        olItem.Subject = Replace(olItem.Subject, "[Gift]", CoffeeAmount) 
        Call replaceText(wdDoc, "[Gifter]", personName)
        Call replaceText(wdDoc, "[Gift]", CoffeeAmount)
    '+-+-+-+-+-+-+-+-+-+-+-+-+-+-+-+-+-+-+-+-+-+-+-+-+-+-+-+-+-+-+-+-+-+-+-+-+-+-+-+-+-+-+-+-+-+-'
    
End Sub

Sub replaceText(wdDoc As Object, findText As String, replaceText As String)
	'+-+-+-+-+-+-+-+-+-+-+-+-+-+-+-+-+-+-+-+-+-+-+-+-+-+-+-+-+-+-+-+-+-+-+-+-+-+-+-+-+-+-+-+-+-+-'
    '+-+-+-+-+-+-+-+-+-+-+-+-+-+-+-+-+-+-+-+-+-+-+-+-+-+-+-+-+-+-+-+-+-+-+-+-+-+-+-+-+-+-+-+-+-+-'
    ' Repeatable loop to replace words in the body, without altering
    ' the HTML formatting.
	'+-+-+-+-+-+-+-+-+-+-+-+-+-+-+-+-+-+-+-+-+-+-+-+-+-+-+-+-+-+-+-+-+-+-+-+-+-+-+-+-+-+-+-+-+-+-'
    With wdDoc.Content.Find
        .Text = findText
        .Replacement.Text = replaceText
        .Execute Replace:=2 ' 2 = Replace all
    End With
End Sub

NOTE: I’ve saved my oft template to “D:\Templates\Outlook\Coffee_Thanks.oft”, you will need to change the code to point to where ever you have saved the template.

There’s a mountain different ways to use this, and you can do various other things like:

  • Calculate the time of day to tweak the greating to a good morning, or afternoon.
  • Find out when the next weekend is, because you’re using this to warn about patching.
  • Add people to the CC or BC fields.
  • Use input choices to add different content.

Download the Code

WordReplacement.vb https://github.com/Works4Me-Info/Outlook-Macros

Enabling Macros in Outlook

I love macros, they are the easiest way to automate your tasks, and if you’re on my site you know I love to automate repeated tasks. Problem is doing that in Outlook is doing it safely. I personally don’t enable macros unless I’ve personally looked at the code.

With that in mind, I have some macros that automate emails and signatures (some of my signatures use layered images and text, which the default Outlook signatures can’t handle). Before we do that I wanted to walk through how to set some security up for doing that.

We will disable Macros, and have Outlook notify us if we use a macro with a certificate (one you PC already knows about and trust, but publising the certificate ourselves). This way we know it isn’t some random Macro, it’s one we wrote.

Step One: Developers Tab

We are going to need the Developers tab for this. Hopefully you already know how to do this one, but just in case, from within Outlook:

  • File > Options > Customize Ribbons.
  • Tick Developer.
  • Click OK.
Developers Tab Selection
Developer Tab

Step Two: Set the Security

  • From the Developers Tab click the Macro Security button.
  • Set the Macro Settings to Notifications for digitally signed macros, all other macros disabled.
  • Click OK.
macro Security

Step Three: Add your Macro

  • From the Developers Tab click the Visual Basic button , then  Insert > Class Module.
  • Insert you VBA Macro.
Sub OpenW4M_Signature()
    Dim MyItem As Outlook.MailItem
     
    Set MyItem = Application.CreateItemFromTemplate("D:\Templates\Outlook\SomeGuy-Signature.oft")
    MyItem.Display

End Sub
Example Code

This is a simple macro to open a oft or Message Template. To make a oft file, just create an email with everything you want it to have, then go File > Save As and change the type to Outlook Template (*.oft).

  • Click Save.
  • Close Outlook and Save the VbaProject.OTM is asked.
Clicking Visual Basic

Step Four: Create a Certificate

  • Run the following:
    • C:\Program Files\Microsoft Office\root\Office16\Selfcert.exe
    • Note: This path will depend on the first version of Office you have installed, so you might have to search for Selfcert.exe in your C:\Program Files\Microsoft Office\ folder.
  • Enter a relevant Name and click OK.
  • Click OK on the Successful Creation Message.

Step Five: Assign the Certificate

  • Open Outlook again.
  • From the Developers Tab click the Visual Basic button.
  • With your VbaProject.OTM selected, click Tools > Digital Signatures…
  • Click the Choose… button.
  • Click OK , if you certificate is shown (most likely, or use more choices to find it).
  • Click OK.
  • Close Outlook – and click yes to save VbaProject.OTM.

Step Six: The Loop

Getting that certificate to stick is the issue. I’ve had real trouble applying the certificate saving, closing Outlook and reopening it, only to five my Vbaproject.OTEM doesn’t have the certificate applied, and you may need to repeat Step 5 a few times – The last time I assigned a new certificate helping someone, it only took 1 repeat for it to take effect.

Once this is working, you will see this, the first time you run a macro each time you open Outlook. If you leave Outlook open for days/weeks – you will only see it that first time.

Step Seven: Adding it as a Button

  • For this Macro you want it to be in the Outlook Quickbar, but some of the Macros I’ll share you would add to the Quickbar of a Message itself, just click on the drop down in your Outlook bar and click More Commands…
  • From the Choose commands from drop down, select Macros.
  • Select you Macro click the Add>> button, then with it selected on the right, click the Modify… button to choose a better icon.
  • Then Click OK.

Now at the click of a button – I get my email opened with a super customised signature.